Wednesday, August 27, 2008

The cutest NECKLACES ever!!


I just came across this artist and I LOVE her work! She makes hand made, glass jewelry, and her name, Andi Reti. She is very talented and I am very impressed with her jewelry.

I am not going to write much here, because the pieces are amazing! You can find them at www.retimade.com . She has earrings and necklaces. Wonder when she will start working on rings and brackets! Each piece looks like a piece of yummy candy!


Thursday, August 21, 2008

Hair care buildup........ A serious Epidemic


So, last week I was having lunch with one of my most favorite people in the whole wide world, and we were talking about hair,specifically shampoos. She was saying how she loves her shampoo but how she was going to have to switch it up because she is getting that shampoo buildup. I grew up with this theory as well. That if you use a shampoo and conditioner too often you will get "the buildup".

Well, this weekend my new Oprah Magazine came in the mail. we must believe everything we read in that bible right! I mean it is Oprah why on earth would she steer us wrong! Well, there is some advice I will take from her and like any other woman with a well developed brain on my head I will question other and wonder why.

So, in the magazine was this fabulous article busting tons of beauty myths and secrets! I oddled with excitement I couldn't wait to open up the magazine and start reading! Please note, these are not Oprah's recommendations. They are from Beauty professionals one of whom is my most favorite Carmindy from TLC's what not to wear. So, as I working my way through the magazine, I come across the subject of hair product buildup not just once but twice! Two times, noted in different parts of the magazine saying the same exact thing, from two different professionals in the field.

So, this is what the professionals said about shampoo and conditioner buildup. It is a big myth. It does not exist. The way one of them broke it down was like this. You use the same products on our face and skin everyday and yet we do not experience build up from that. Makes sense, I have the same exact routine daily. Not only products that I place on my face, but cleaners that I use to wash those products off.

So, ladies relax and enjoy your shampoo and conditioners, they are not taking over your hair. But if you feel the need to change formulas because you are lacking a little bounce then so be it. Remember, when you change shampoo and conditioners your hair is going to react differently to each because of the formula. Even if they are the same smoothing formula for example, they are made differently, so what you are experiencing is just a change. Almost the same way our skin changes with a change in the weather.


Another something to note that I came accross, SPLIT ENDS!!! The professionals say there is no way on this magificent earth to repair a split end. There is no magical shampoo or conditioner that will do the trick. The only way to repair the hair and keep the end from splitting further is to.... that is right, get a hair cut. So, do not buy rediculously priced shampoos that say they are going to repair that hair, because it can't. It just isn't possible. Instead go spend twenty bucks on a trim. It will give your hair more shine, and more bounce than any shampoo and conditioner ever will.

Tuesday, August 12, 2008

Is there an order to put on your makeup?


The other day I was watching as a unknowing woman was putting on her makeup. As she was putting it on, I noticed, why did she put on her eye liner then her eye shadow... It got me thinking, is there a proper order to put on your makeup?

I honestly think so, I think if you put it on in a certain order it will have better "staying power" so to speak. For example you wouldn't put on your blush before your foundation, would you? So, on that note, I will offer up the order in which I believe you should put your make up on.

First always start with your moisturizer, always!
Then put on your foundation, since you just applied your moisturizer your skin is nice and slightly moist to help spread the foundation. Warm the foundation up in your hands before placing it onto your face. Then start in the middle of the face and work your way outward. Working from the middle outward will help prevent any foundation lines.

Next, I apply my cheeks, I use a cream blush. I prefer cream because it is easily controlled and lasts longer than a powder.

From my cheeks I work my way up to my eyes. First things first (for me) I apply a light shimmery cream over my eyelid, just to open up the eye and brighten it. Then I use a cream eye liner right along the lash line, I personally don't care for a hard, bold, line. I think on some people it looks very classic but on myself, it just looks like too much. Then I apply my mascara working from the outer lashes inward.

If I had eyes that did not hold makeup well (oily eye lashes), the eye liner is always smearing, the eye shadow NEVER stays, this is what I would do. I first use a eye base. Clinique has one called Canvas touch base. They have it in multiple shades for almost any skin color once it is blended it. Placing this on the eye works as a "gripper" for the makeup. This is a cream blend so it also has much better staying power. Then apply your eye shadow, if you must be stubborn and buy the cheap stuff it will last much longer when applied over the base. However, if you will buy eye shadow made for women with oily eye lashes you will need to buy a better quality eye shadow. Look for creams, or waterproof eye shadows. There are lots of manufactures out there with lots of colors to choose from. We all have different skin types so why use an eye shadow made for someone else. After you have applied your eye shadow and created the eye you like, then put on your eye liner. Again, use eye liner made for your eye. Waterproof and smudge proof. Test it out on your hand when you buy it, stroke the eyeliner across the back of your hand, let it set (about 60 seconds) then try smudging. If it does not smudge this is the eye liner for you. Last apply mascara, working from the outer lashes inward.

After my eyes, I like to move to my lips, for me usually I like to play up my eyes, so the lips get a lip gloss. They aren't my best feature, so I don't want them to have the attention. If you want your lips to have the attention then down play your eyes.

Finally always set your makeup with a powder. This will help set the makeup and it will help it stay longer.

I hope these tips help you apply your makeup and help it stay on all day long!

Wednesday, August 6, 2008

Proactive = amazing!


Sorry that I had to push off my normal Monday post. This current post took a little bit more research.


Since I have been pregnant my skin has started breaking out worse than ever. I have never had acne. I have had the occasional pimple but nothing that would make me run out to the store and try to pressure cook them out of my skin.


I told my husband a few weeks ago, when I was applying my normal clinque three step to my face I think I am going to have to invest in something stronger for my skin, he quickly agreed. So, off to do my research, there are so many products out there, which one do I choose, which ones can I use while I am pregnant. I asked my doctor about proactive he gave me the go ahead and approved its use while I am pregnant.


I have been using it for almost a week now and I impressed! This stuff is taking no prisoners with my skin. I have noticed not only are my pimples clearing but black heads that I had on my nose and chin are clear as well.


I must note do not use this stuff anywhere near your eyes or the tender skin around your eyes, it will sting. It is too strong for that tender skin.


If you are struggling with acne and are trying to find a product out there that works, this product works. I am curious how it compares to the advertised half the price Acne Free product. But for right now, I am on board with the more expensive Proactive, hopping that I do not have to purchase this stuff to often.


Hopefully before too long, my skin will be just as clear as Jessica's. Fingers crossed!

Friday, August 1, 2008

hair straightner


So, this past weekend I went to visit my girlfriend in Dallas. I like to pack lite so I didn't want to bog my suitcase down with stuff that she might possibly has up there. I figured if worse comes to worse I would just throw my hair up in a pony tail and be free to not deal with it all weekend long.


Well, I am super glad that I did NOT pack my hair straightener, because I got to use hers! And oh MY!! Hers is AMAZING!! No, it isn't one of those ridiculously expensive chi's... It is a Jilbere, I have NEVER heard of this brand before, ever. Let me just tell you, it takes me usually about fifteen minutes to straighten my hair usually, with this flat iron, my hair was done in two minutes! I didn't have to keep running the iron through my hair, which is incredibly bad for it! But normally that is my routine. I run the flat iron over a strip of my hair 2-3 times before it gets it nice and straight.


So, after using this magical flat iron I had to have one for myself, I was worried that it was going to cost me a ridiculous arm, but it was very affordable! I went to Sally's Beauty supply and picked up the straightener for right about forty bucks! My last flat iron cost me thirty and it is worthless!

I am a firmly recommending the brand Jilbere! Here is the link if you would like to look at the flat iron. http://www.sallybeauty.com/on/demandware.store/Sites-SA-Site/default/Product-Show?pid=JLBERE35&cgid=Hair

Tuesday, July 29, 2008

Bag, borrow or steal.com


So, after watching one of my most anticipated movies of all time, Sex and the City, I had to check out bagborroworsteal.com. It took me a bit to get around to checking out the site, but I finally made it! And I must say that I am really impressed not only at what they offer but the prices at which they are offering these designer bags at. Granted it is just for renting them, however they do have an outlet area where you have purchase the bags.


Not only do they offer designer bags, but they offer designer jewelry & sunglasses. Plus, they also offer insurance on the items you rent. Not a bad idea in my book at all!


bagborroworsteal.com definitely has my vote! I am very impressed!


I am not the type of girl to be flaunting around my designer bag by any means, but sometimes a girl just falls in love with something so fabulous that she has to have a little bite of it. Plus if you have a nice occasion to splurge on something how great would it be for your accessories to make you feel like a million bucks!


Check out the website!


Monday, July 21, 2008

Halsea


I was watching the Today Show this morning and these bags really jumped out at me! They are super cute. Have a bit of a price tag, still pretty cute!

Check them out!
www.Halsea.com

Thursday, July 17, 2008

What brush do I choose...?


I am in agreement with the experts on this one. You should really try using a soft bristle brush. Using a soft bristle brush will help distribute the natural oils through out your hair providing less dry out and a much healthier mane. For us thicker hair ladies you have to be patient when using your bristle brush and work in sections.

The long term effects of using a soft bristle brush, healthier hair, less damage and will help control oily scalp. Use in combination with washing your hair every couple of days and voila, you are on your way to very fabulous hair!

Tuesday, July 15, 2008

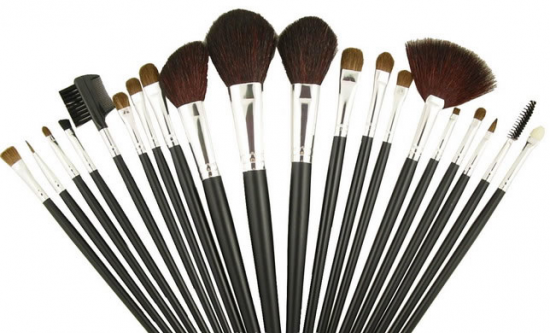
Seriously... I have to wash my makeup brushes?


So, I was putting on my makeup the other day and I realized... When was the last time that I washed my makeup brush? I about cringed! I have had a lot going on lately so my makeup brushes have really taken a back seat. Which is BAD! Very bad. Not only do they carry bacteria in them that you are constantly continuing to put on your face but your makeup builds up in the brushes and just doesn't apply properly. So, I set aside five minutes and cleaned the much needed brushes! This morning when applying my makeup I was like, YES that is the way it is supposed to go on!

So, how to clean your makeup brushes?


There are options here. You can use an actual cleaner made for your brushes like the Clinique makeup brush cleaner. Just spray it on your brush and use a cloth and wipe clean until all makeup is removed. Careful not to break your bristles.

Or you can use just plain old soap and water... I don't recommend this if you have expensive brushes. Take a dab of soap and water and gently apply soup through out the brush almost as if you were washing a paint brush. Generally it takes several soap dabs to remove all the makeup.

Last place in a container to stand upright to dry.

I am also a fan of the clinique makeup brushes. They are super soft and don't break off when you are applying your makeup. A pet peeve of mine, after I have done my makeup I look down and I am covered in bristles... I am not a fan of brushes that fall apart.

So remember to clean your brushes, It is recommend that you clean after each use; but I am a practical girl, once a week is good for me.

Monday, July 14, 2008

Sample Sale...huh?

So, I was reading my Oprah Magazine and came across this Editors' Choice pick.. called the Early bird deal.. I give what is it exactly. From what I can see so far, you have to be invited to join this community at www.ideeli.com. The benefits of being a member, you can by accessories before they actually go on sale at very discounted prices! Oprah readers have an invitation to join. Just type in the code "Oprah".

I am still waiting on my invitation to join..

Monday, July 7, 2008

Find your perfect shades!

I was indulging in my People Magazine on a road trip this past Fourth of July weekend and I came across this and thought I would share!

This article determines which shape of sunglasses work with your shape face. Who couldn’t use this information!


Long Face Shape: Try Wide Oval frames. Wide frames create the illusion of less length. Ovals, oversize round shapes and aviators are good options. Avoid: Vertical lines and sharp angles.

Round Face Shape: Try Angular Rectangle. Angular frames detract from roundness. Square, rectangular and glasses with high temples will flatter you. Avoid: Rounded or curved styles.

Heart Face Shape: Try Butterfly Shape. Frames that dip between the eyes breaks up the width of the forehead. Avoid: styles with hard horizontals across the top and pointed bottoms.

Square Face Shape: Oversized Round. Curved, oval or round frames with long lenses soften angles and make face appear longer. Avoid: Squares, rectangles and any hard angles.

Oval Face Shape: Classic Style. Any style you like. You can pull off most any shape as long as the glasses are in proportion to your face and features. Experiment with sizes and styles.

Wednesday, July 2, 2008

How to achieve beautiful hair!


So, pretty much anyone who knows me knows that I love healthy hair. If my hair ever becomes unhealthy; I get it chopped off!

So, on that note; I will tell you my secrets targeted at keeping my hair healthy and feeling great!

It took me a long time to find a great shampoo and conditioner. I use Garnier Fructis. I have tried all kinds of different shampoos and I have found that this one doesn’t stress my hair the way others do. I highly recommend following your gut on your shampoo and conditioner. You know when your hair feels great! Use the shampoo that makes it feel that way all the time. I don’t believe in spending tons of money on your hair care products.

The next step is do *not* wash your hair everyday. Let the natural oils build up. If you have a naturally oily scalp and think; OMG I can’t do without washing my hair! You can use water to rinse your hair just don’t use the shampoo. Also, to freshen your hair, use baby powder.

On your shampoo days find a leave in conditioner that works for you. After you have cleaned and conditioned your hair, before you get out of the shower, take that leave in conditioner and put in your hair. Sometimes I take a little water and help it run thru my strands. This is good to use while you are still in the shower because the hair follicles are still open.

Then when you get out of the shower, don’t twist up your hair. Take the towel and gently wrap it around your hair. Let you hair naturally lay. Your hair is the most vulnerable when it is wet.

I hope this helps you when taking care of your hair everyday! Sometimes it is trial and error when playing with our hair. And if you have hair that is unhealthy, do *not* be afraid to get it cut. It will feel much better if you take care of it!

Thursday, June 19, 2008

Your 5 minute Summer Face!

I have a friend going to the beach this weekend so I thought it was time that I address the quick summer face! Summer faces are supposed to be quick and help give you that extra glow!!!!


A few things you need for the perfect touch!

1. Moisturizer with SPF at least 15.

2. Bronzer! - a great bronzer is sometimes all you need! Bronzer should be applied with a wide fluffy brush and placed where ever the natural sun would hit your face; swept across the forehead, chin, nose, apples of the cheeks and neck. You can also decorate the décolletage with it. This will give you a warm glow! Remember your skin color when choosing the right one. If you have a lot of pink in your skin choose one that is more brownish. If you have olive skin choose a pinker one. For Yellow tones you can generally wear either depending on the darkness of the shade. My favorite is the Bronze Goddess from Estee Lauder. It has a fantastic color!


3. waterproof mascara - I do NOT recommend this for daily use; but for water purposes it is great. I love the new LOREAL Voluminous Natrurale in a the yellow/golden tube. This new formula does NOT clump! I feel like it is more of a stain than a thick nastiness that I am putting on my eyes. Plus they have a true brown black! I love it!

4. lip gloss with spf at least 15 (Clinique has a long wearing, fabulous one! in many shades)


I have a slight variation if I am going out.

5. Champagne colored eye shadow - when choosing a shadow opt for a cream, they last longer and if you have oily eyes (meaning your eyeliner and shadow never stay, because your eye lashes produce too much oil) this will make your life so much easier! They won't run or smudge after they are set. usually in 30 seconds or so. I use the clinique touch tint for eyes in Nude Sparkle.

6. Eye liner - Again, opt for a cream liner. Cream liners are long lasting and don't smudge once they are set. There are some that are waterproof! Cream liners take a little practice but you will apply with a fine brush - Sally's Beauty supply has a fantastic liner brush, at a great price! The one I love is clinique's brush-on cream liner in Black honey. This is a beautiful color!


This is my staple for summer! Enjoy! And really embrace your natural beauty!

Tuesday, June 17, 2008

Hair Removal Products

I am a BIG advocate of hair removal strategies! When it comes to hair removal what are you wanting? Do you need to watch the pocket book, or are you ready for whatever it takes to have the hair out of your life and never have to worry about it again?

Depending on what your personal options are this is what I suggest.

If you have some extra money; look into laser hair removal. I have had it and I would recommend it to ANYONE! It is wonderful and you don’t have to worry about the hair ever again! It does take multiple treatments so plan on the hair removal process taking a year and a half or so. I had my upper lip, chin and neck done for a total cost of 475ish.. I can’t remember the exact amount. But when I think about how much I was spending getting my lip waxed every couple of weeks; the cost quickly diminished. I highly recommend this. I am also going to be getting my legs done next; however you can not treat while you are pregnant, so I have to wait.

For a quick fix. I love the new Sally Hansen spray on hair removal spray. The order is tolerable, it works very quickly and it really works! I also like the Mouse. The only downside is that you spend $8 per bottle of this stuff and are lucky to get two-three treatments. And I have short legs..

I also like using my husbands razor. For me, it is a much closer shave! I use it with a women’s cream and I have a great close shave.

Now tricks for the bikini area; if you get razor burn or irritation from shaving the secret is Neosporin and Baby powder. Use the Neosporin as soon as you get done shaving then pat with the baby powder and you will NOT get the yucky irritation. This works like a gem.


My best advice; look into laser hair removal options in your area; chances are they are more affordable then you may think. Think if you spend 40 every few weeks on getting your bikini area done; with in a year you have spent at least 500 bucks! And probably for a couple hundred you could have had it permanently removed. Almost seems silly doesn’t it. And yes it does work! It takes time, but it is wonderful!

Tuesday, June 10, 2008

Moisturizer..


After lunch with a couple of gal pals yesterday I feel it necessary to speak about moisturizers… And maybe a few other things we find in our bathroom cabinets.

Remember, these things do have an expiration date. If you can’t remember when you bought it or when someone gave it to you, TOSS IT! Don’t even hesitate. It could be more harm than good to your skin if it is old!

Everyone is in the same boat here when it comes to moisturizers.. Meaning, EVERYONE and every SKIN TYPE must moisturize. If you have oily skin, you will use a different moisturizer than someone with dry sensitive skin.

Also, it is important to note; that your neck is treated with the same care as your face. This too is skin that is susceptible to quick aging… No one wants a goose neck….

You are never too young to start taking good care of your face. However; if you are young lets say 14ish.. And you have acne trouble as most of us did at that age or some point. You will want to use a product that treats for acne, if you find this product to be too strong, try another. Not all products are created equal, what works on someone may not work with your particular body chemistry.

Most important, moisturize! Don’t just stop at the face, treat the whole body! Enjoy this me time! Get acquainted with your body. This might be the best time you have to pay attention to moles and sun spots.

OILY SKIN
If you have oily skin look it is just as important for you to moisturize. Moisturizing for oily skin will help rebalance your skin and you should eventually notice your skin calming down and not over producing oils. Just make sure you use a moisturizer that is oil free.

DRY SKIN
Dry skin you will want a moisturizer with oils in it. You can use either, but one with oil your skin will just drink up.

COMBINATION SKIN
Then there is the combination skin type… I fall into this category my forehead is oily the rest of my face is normal. My forehead oil is drip from the scalp. It is important to try and pin point where your oils are coming from. Do you notice them around the eyes? Then your eye lashes are probably producing too much oil. You will want to adjust your eye makeup to non-smudging.

Monday, June 2, 2008

Sun Block!


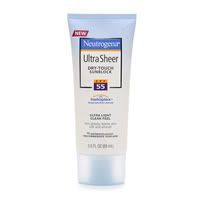
When it comes to sunblock and the mighty powerful sun; ALWAYS opt for using! Here are some tips!

1. First determine the level you are wanting..
I recommend always using at least spf 30 with UVA & UVB protection.

2. Put on the sunblock at least 30 minutes in advance before ever getting into the sun. This allows the sunblock to really sink into your pores enabling the ultimate in protection.

3. Replenish your sunblock at least every two hours.

4. If you are swimming while wearing your sunblock... Even though it says waterproof! Replenish at least every hour and let the sunblock set in before getting back into the water.

Sunblock is very important! Even when you are wearing sunblock you are still going to tan. Just be smart don't burn!!! Who wants a painful sunburn?

Be smart put on your sunblock thirty minutes before you go out in the sun, and replenish at least every two hours! protect yourself!


Be extra careful and wear sunscreen everyday; either in your foundation or put lotion. There are lots of products that put at least spf 15 in their foundation or lotions so take advantage of that. Do not rely on that as your only source of protection, you would have to put on a ton of foundation or lotion in order for it to protect you. But every bit helps!

I hope this information helps you with your sunblock confusion!

Tuesday, May 27, 2008

Nails

When you look down at your nails what do you see? Do you see a well manicured paw?


Here are some simple tips to keeping your nails in tip top shape!

1. use Cuticle oil daily - I keep mine at my desk, When I have a minute I put it one and rub it in. 2. get a good hand cream - I keep this too at my desk. The soap at works is horrible at drying out hands; so it gets used frequently!


3. Push back your Cuticles - You can do this after you have used your cuticle oil or after a good soak in warm water.


4. Buff the flakes off of your nails


5. invest in a buffer that will shine your nails


Other options


1. the Nail salon....Now, if attempting to use the nail salon; you MUST be vocal... Even if they pretend to not speak English.. You can get your point across. I once got into a verbal argument right there in the nail salon because the man was going to give me the square, white tips down to my cuticle, porn star look they he did on every woman that walked in... OH NO!!! I don't want my tips that far back; but miss you have to do to often if not... um, I don't care... I also want them round... No, miss this make you look old.. the young girls down square... Do, I look like I care if I look old? NO!! I want them round. And while we are at it; they are too thick; they need to be thinner!


My point is - if you want your nails a certain way - tell them; they may make fun of you, but they get it.


Now how do you know what type of nail to get at a salon?


Here is my rule; if you have great nails, meaning you can actually grow them out to where you don't look like you enjoy them for breakfast; you don't really need nails. Maybe a manicure every two weeks or so to keep them in shape; because who doesn’t want to be pampered... really!


If you have weak brittle nails that are no hope -I recommend Solar nails. This is why, they stay looking new longer. They are buffed to a shine so the polish never flakes or wears out. And pay attention to your natural nail; have them duplicate the same for the solar nail. Just because it is a fake nail doesn't mean we want it to look fake... I mean come on; not all of us are blessed with fabulous nails... Some of us have to work at it.


Acrylic nails - are great if you are on a tight budget and you just need something.


Silk nails - this is when they actually apply silk fabric onto the nail bed. I do not care for this look. It is noticeably fake... And it doesn't even look that good.


Solar nails – I believe they use the same acrylic products however; because they use a different process the outcome is different and much nicer.


Tuesday, May 20, 2008

How to choose the right foundation for you..


Picking a foundation is a rather tedious job and can be expensive if you get it wrong multiple times. There are secrets to getting this right. First things first, NEVER be afraid to return something if it is not what you expected. Stores expect this so don't feel bad. And don't let miss/or mr.. counter person make you feel bad. But, how often do you get the third degree from a dude about your makeup being wrong AND the ladies should understand.. so why the snarly face or snake eye? It just didn't work it, it turned my face purple so just give me my refund...


So, when it comes to choosing your perfect foundation; some things to remember!


1. Always check it in the sunlight.


2. Always use the nose - cheek area for a strip test, NEVER use your hand or neck. Hello, they are different colors than your face.


3. When using the strip test; never rub in, after it dries if it is the right color for you, you will hardly be able to notice the makeup strip on your face.


4. Always apply makeup in a well lit area. Not your closet. Set yourself up with a nice area for applying makeup; invest in a makeup mirror that has a bright light on it and use it. Who knows you might even notice some other things when you look in that little bastard!


5. Determine how much coverage you need... Most woman think; wow I need full coverage.. I have news for you; unless you have peperoni face, birth marks, or some skin discoloration you don't need full coverage. I would venture to say that for about 80 percent of women light coverage is more than sufficient. Anything heavier than that and you are going to look like a Geisha.


6. Heavy coverage / full coverage is for people who have some serious "flaws" to cover. Freckles don't hardly count. They are cute; embrace them, they will never go away! So enjoy the extra color they bring to your face and work them to your advantage.


How to do a strip test.


Remove all makeup from face. Take a Q-tip dip into the foundation that you are testing. Then strip from the nose across the cheek. This is were most of your color variation comes from in your face so this is the area you should always test. Always look at this under the brightest light you can find. Sunlight is best.


How do I know what formula to use?


This is when you are REALLY going to have to look at your skin texture and type. What I mean by that is; are you prone to breakouts? Are you oily in some places but not others? Are you dry? Does your skin change depending on the year. My best recommendation here is do your homework; ask for help, go to a makeup counter; my favorite is Clinique. They will sit down with you to help determine your skin concerns and help you correct them. If you have acne prone skin there is foundation that will help combat that. For dry skin there is anti-aging makeup. The more dry your skin is the quicker you are going to age. So really take care of that by using the right makeup. If you have oily skin you will want to use a makeup that is oil free or that will help remove excess oil from the skin without over drying.


How do I apply the foundation?


There are lots of variations. And really it falls into whatever works best for you. But always start with the foundation in the center of the face and work your way out; that way you don't have streaks for a hard line.. (you know what I am talking about) I start with a dab of foundation in my fingers, I rub it a bit to warm it up then I apply, preferably before my moisturizer is dry. If you have acne prone skin; things are a bit more complicated for you. You can use your hands however; you MUST wash your hands before and after you apply your makeup, otherwise you can do future damage. What is recommended for acne prone skin is using throw away sponges. Use them once and toss. Don't even look back. You can buy them just as cheap as cotton balls. If I had the luxury... (dreaming.. maybe one day) I would airbrush my makeup on, allowing me to achieve the perfect balance of coverage and color!


How do I plan for my summer face?


Now for summer foundation; I have a totally different set of rules. For summer I suggest going with a tented moisturizer with SPF (at least 15, the higher the better). A tented moisturizer is going to allow you to more flexibility for color. And the bonus is that is still has some great coverage without others being able to notice an increase or decrease in color. Now they also have SPF protection for your lips as well! I highly recommend. I LOVE the clinique lip gloss formula! But that is a completely different topic!


How do I Finish the look?


You should ALWAYS set your foundation and the rest of your makeup with a loose powder. You might be thinking well, what in the world will this do? Or will it make me look chalky? Absolutely not! What this does, and it works fabulously for all skin types is set the makeup. Apply loose powder with a brush and sweep it over the skin in circular motions. I use Clinique Gentle light powder. It has a light, silky feel and leaves a very subtle shimmer behind.


Friday, May 16, 2008

Sunless Tanner................ahhh


So it is that time of year again when everyone wants to be a bronze goddess! However, some of us, the ones who think about the ageing process of our skin, are more practical about how we go about being the bronze goddess. And some of us gave up a long time ago, because lets me honest, I don't have to time or energy to keep up with it... That is where I stand... Right there, in that I don't have the patients to manage the upkeep. I have tried and I have tried, I admire those who can be persistent and have a nice skin tone. But it is not me. However, I have discovered the right and wrong ways to go about achieving the perfect glow from the sunless tanner.

This is very critical ladies! If you don't do this right you will suffer for at least a week. Sometimes even longer! First things first let’s talk product… You can’t be cheap here ladies… You get what you pay for is not just a cliché, it is a true statement! I have a couple of go to products when I need the glow for an event or perhaps an evening.. Or maybe I just choose to wear shorts that day and I need something instant. I am great at applying when I need it, just not good with the upkeep.

So, here is what I have found. If you are good at putting on a daily lotion, then you can get away with a gradual self tanner. These tend to work great and they do gradually give you a great color. If you are looking for a quick bronzed look and you only have a short amount of time, there are some great products out there. Don’t give up ladies each year these products are only getting better and better! It is like the computer each year something new and ground breaking comes along! So don’t ever give up on them completely. And try different products and don’t forget to try a different company. So, I have stumbled onto L’Oreal Sublime Bronzer gel and spray. I LOVE this stuff! This stuff works so quickly! The spray is great; it develops within a couple of hours. The gel is instant.

Rule number 1 before applying self tanner…
ALWAYS exfoliate… If you forgot this step, your tanner will not last as long, but it isn’t the end of the world.
Next, apply regular lotion, nothing with a tent or a gradual tanner. Applying regular lotion will enable the self tanner to not overdue certain areas… like knees, heels, elbows, toes… I always mess up my toes, but I am getting better. Also, another way you can keep these areas from over bronzing is to use Vaseline. As easy and basic as it sounds it is true! Plan ol’ Vaseline. Just lube up those areas then use your tanner.

Another very important thing to remember if you are using a spray tanner, do NOT put it up close to your skin. This is BAD and will look horrible and runny! Keep your distance and spray away. Also, don’t do your toes.. The drizzle from the rest of your body has covered your feet well. No need to over apply!

I hope this helps ladies. Now go get bronze!

Thursday, May 15, 2008

Smokey Eyes


Today from the request of a dear friend I am going to talk about Smokey eyes! Every woman wants them.. But how do we achieve the perfect smokey eye without looking like we have a black eye, are a porn star or even worse weird lady with WAY too much makeup on…

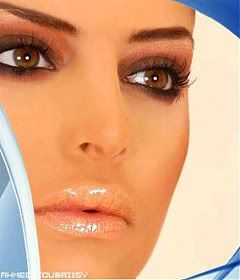
First things first; put on your foundation make sure you have it seem-less. Then place a little uplighting under your eye (at the top of the cheekbone and inward). If you have dark circles naturally, try adding uplighting to the interior of the corner of the eye. This will lighten the eye area. Next, pick your colors. If you are light skinned try for browns, peaches, Burgundy's. If you are medium tones, you have the whole world to play with, but if this is your first time, try greys, purples, dark greens or blues. Stay away from BLACK! This will do what we talked about above... We don't want a black eye, so don't put it on, at least while you are still new to this.

Now that you have selected your color add your lightest color from the base of the lid up to the eyebrow. Come over next with your next darkest color in the picture it would be the peach color. Place that in the crease of your eye. Go below the bottom lashes smudge a bit down there. Q-tips work great for this, or a small eye liner bush, one of my favorite make-up brushes! If you don't have one; you need to invest! Next come over the base of lid with your darkest color. Don't be afraid that it looks to dark at this point. It is will look slightly awkward until we complete the process. Remember to smudge it to the outside corner of the eye. Add a small line below the bottom lashes with your eye liner brush (or Q-tip).

Next, using the eye liner. This is the crucial point. If you are to complete the smokey eye look you can't be afraid of the eye liner... In the picture she used a deep brown black. Compliment the colors you have used on your eyes. If you used browns stick with a brown. If you used Greens go with a dark green. Line your lashes with a bold yet fine line of liner. On the top go completely from corner to corner. DON'T STOP HALFWAY! On the bottom half do the same corner to corner. Use your liner brush and smudge the liner before it sets. If you are using cream liner you have an advantage, you can smudge as your are placing the liner. I recommend cream liner, it sets quickly usually in 30-45 seconds and it wears all day long. I use Clinique cream liner in Black Honey, daily.

Now that you have your eye make up almost done lets talk about the rest of your face. If you have smokey eyes, your lips need to be nude and your cheeks bare. So choose colors accordingly. You need a little something there so you don't look like Casper but only play up one feature at a time. A nice nude gloss like the one pictured goes a long way on the lips. Set your makeup with your loose powder using a powder brush.

Finally, come over the lashes with a mascara. In the picture they used a black brown. My recommendation, unless your hair is dark brown or black, don't use black mascara. Do your bottom lashes first. Apply to the ends first then work your way into the eye. That goes for both the top and bottom lashes. After your first coat of mascara dries apply your second coat.

Now your look should be complete without making your look over done. If it isn't just perfect keep practicing, work at making the perfect smudge transition to the outside corners of the eyes. Also, play with the colors that you use. Don't be afraid of color, Just remember to avoid looking like that girl who wears too much makeup, only play up one feature on your face at a time. If you remember that rule you should be rockin' your smokey eyed self!


Welcome!

I was inspired to write this blog thanks to my friend, Proper Paige. You should check out her blog at www.simpleetiquette.blogspot.com as well. She will give you all the 411 on Etiquette.

This blog however, will focus on something slightly different, but maybe closely related right? If your etiquette is well sculpted you will appear more attractive right. Well, while Proper Paige is working on the inside, I am going to work on the outside! Get ready ladies and gentlemen; I have lots of useful beauty secrets to spread!

I am excited to share my only source of wisdom!